How I customized Outlook notifications with PowerShell

Motivation
I suppose most of the people who use the Outlook desktop app turn on desktop banner notifications that pop up in the bottom right corner. They are helpful but I feel a bit distracted. I don't want to read even the summary of emails at random timing. I want to have better control over when to read them. So, I turned off banner notifications and instead, enabled this envelope badge on the taskbar icon you see when you have unread emails. I like this because it's more subtle than banners.

However, this badge is only shown for your default inbox. If mails are moved to other folders by rules, you don't notice them unless you open the Outlook window. Do I have to give up folders? No, I can make my original folder notifications.
Why PowerShell?
When I do some kind of automation on Windows, I use PowerShell. It's great for testing how objects work using the terminal and is easy to turn into a script. I was just testing out and learning how the Outlook COM objects work on the terminal at first but I ended up making the whole app with PowerShell because as I progressed, most of the things I wanted to do turned out to be possible. That's the reason for me this time. It could also be rewritten in C# if some motivation arises.
Get the unread count of an Outlook folder
If you have installed an Outlook desktop app, just open PowerShell and type the following three lines. You'll see your root folders.
$outlook = New-Object -ComObject Outlook.Application
$namespace = $outlook.GetNamespace('MAPI')
$namespace.Folders
Folder object has its subfolders as a property so you can recursively search for the folder that you want to monitor. Each Folder object has a unique FolderPath property which looks like this \\your-email-address@sample.com\folder-name and can be used to identify it.
$folderPath = '\\your-email-address@sample.com\folder-name'
$rootFolders = $namespace.Folders
foreach ($rootFolder in $rootFolders) {
    $subFolders = $rootFolder.Folders
    foreach ($subFolder in $subFolders) {
        if ($subFolder.FolderPath -eq $folderPath) {
            # this is the folder you are looking for
            $subFolder
            return
        }
    }
}
Items property of Folder object contains emails. You need to find unread items from them to get the unread count. Items property has Restrict method for this kind of search purpose so you can get the unread count like this:
$unreadItems = $folder.Items.Restrict('[UnRead] = True')
$unreadItems.Count
Refer to the official documentation for other examples of how Restrict function works.
Taskbar icon
Now we got the unread count. We need a place to notify it. As I said earlier, I like badge notifications on taskbar icons so I thought it would be best if we could show a taskbar icon per Outlook folder and a badge counter on it. To get a taskbar icon, you need a window. Let's create a WPF window in PowerShell.
We don't need any UI elements this time so the XAML file can be like this minimum setup.
<Window xmlns="http://schemas.microsoft.com/winfx/2006/xaml/presentation"
xmlns:x="http://schemas.microsoft.com/winfx/2006/xaml"
Width="320" Height="180"
AllowsTransparency="True"
Background="Transparent"
WindowStyle="None">
</Window>
Once you've created a XAML file, you can load it and show the window by the following code:
Add-Type -AssemblyName PresentationFramework
$xaml = [xml](Get-Content $xamlFilePath)
$nodeReader = New-Object System.Xml.XmlNodeReader $xaml
$window = [System.Windows.Markup.XamlReader]::Load($nodeReader)
$window.ShowDialog()
A window is created and an icon is shown but the problem is that in this way the PowerShell icon is always used.
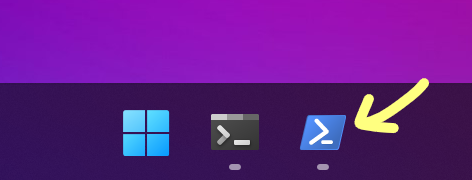
To customize the icon image, we can create a shortcut to the PowerShell script and assign a custom icon to it. The PowerShell terminal can be also hidden by adding -WindowStyle Hidden argument to powershell.exe. Luckily, we can use PowerShell again to help create the shortcut:
$shell = New-Object -ComObject WScript.Shell
$shortcut = $shell.CreateShortcut('D:\out.lnk')
$shortcut.TargetPath = 'powershell.exe'
$shortcut.Arguments = '-ExecutionPolicy Bypass -WindowStyle Hidden -File "D:\script.ps1"'
$shortcut.WindowStyle = 7 # Minimized
$shortcut.IconLocation = 'D:\sample.ico, 0'
$shortcut.Save()
You'll get this by running the shortcut👍

Badge counter
The badge on the taskbar icon can be accessed via Overlay property of TaskbarItemInfo class. Define a TaskbarItemInfo in the XAML file:
<Window xmlns="http://schemas.microsoft.com/winfx/2006/xaml/presentation"
xmlns:x="http://schemas.microsoft.com/winfx/2006/xaml"
Width="320" Height="180"
AllowsTransparency="True"
Background="Transparent"
WindowStyle="None">
    <Window.TaskbarItemInfo>
        <TaskbarItemInfo />
    </Window.TaskbarItemInfo>
</Window>
then you can access it from PowerShell:
$iconSize = 20
$dpi = 96
$bitmap = New-Object System.Windows.Media.Imaging.RenderTargetBitmap($iconSize, $iconSize, $dpi, $dpi, [System.Windows.Media.PixelFormats]::Default)
# Render an unread count to the bitmap here...
$window.TaskbarItemInfo.Overlay = $bitmap
This code just sets a transparent bitmap so nothing is shown yet. We need to render the unread count to the bitmap. The badge is made with a background and a number on it. The number is a variable part and the background is static so we want to use a template for the background and replace the number afterwards. For this purpose WPF provides ContentControl and DataTemplate. If a DataTemplate is specified to the ContentControl.ContentTemplate property, ContentControl applies the template to its Content and builds the UI. First, let's define a DataTemplate as a XAML resource:
<Window xmlns="http://schemas.microsoft.com/winfx/2006/xaml/presentation"
xmlns:x="http://schemas.microsoft.com/winfx/2006/xaml"
Width="320" Height="180"
AllowsTransparency="True"
Background="Transparent"
WindowStyle="None">
    <Window.TaskbarItemInfo>
        <TaskbarItemInfo />
    </Window.TaskbarItemInfo>
    <Window.Resources>
        <DataTemplate x:Key="OverlayIcon">
            <Grid Width="20" Height="20">
                <Rectangle Fill="DeepPink"
                            Stroke="White"
                            StrokeThickness="1"
                            RadiusX="4"
                            RadiusY="4"/>

                <TextBlock Text="{Binding Path=Text}"
                            TextAlignment="Center"
                            VerticalAlignment="Center"
                            Foreground="White"
                            FontWeight="Bold"
                            Height="20"
                            FontSize="14">
                </TextBlock>
            </Grid>
        </DataTemplate>
    </Window.Resources>
</Window>
Then you can render a ContentControl using the template:
$unreadCount = 1
$iconSize = 20
$dpi = 96
$bitmap = New-Object System.Windows.Media.Imaging.RenderTargetBitmap($iconSize, $iconSize, $dpi, $dpi, [System.Windows.Media.PixelFormats]::Default)
$rect = New-Object System.Windows.Rect 0, 0, $iconSize, $iconSize

$control = New-Object System.Windows.Controls.ContentControl
$control.ContentTemplate = $window.Resources['OverlayIcon']
$control.Content = [PSCustomObject]@{
    Text = $unreadCount
}
$control.Arrange($rect) # place the UI elements and set the size
$bitmap.Render($control)

$window.TaskbarItemInfo.Overlay = $bitmap
In the XAML file, {Binding Path=Text} means that it is bound to the Text property of the binding source. Here, the binding source is ContentControl.Content so the Text property of the PSCustomObject is passed to the TextBlock.Text.

We're getting close😃
Timer function
We have a way to get an unread count and show a badge counter, so now we just need to call it at some interval. We have some Timer objects available in PowerShell but we use System.Windows.Threading.DispatcherTimer this time. It calls a given function in the WPF UI thread. All the UI components, the overlay badge in this case, must be updated from the UI thread so this is the right one.
$intervalInSeconds = 5
$func = {
    $unreadCount = GetUnreadCount
    UpdateIconOverlay $unreadCount
}

$timer = New-Object System.Windows.Threading.DispatcherTimer
$timer.interval = New-Object TimeSpan(0, 0, $intervalInSeconds)
$timer.add_tick($func)
$timer.Start()
What should happen when clicked?
Normally, the associated window opens when its icon is clicked on the taskbar but it's not what we expect for this notification app. The ideal behavior for me is that if the unread count is 1, it opens the unread email directly and if the count is 2 or more, it opens the Outlook folder without showing the app window we created. This can be achieved by adding a StateChanged event handler like the following:
$window.add_StateChanged({
    if ($window.WindowState -eq [System.Windows.WindowState]::Minimized) {
        return
    }

    $unreadItems = $folder.Items.Restrict('[UnRead] = True')
    if ($unreadItems.Count -eq 1) {
        # show the unread email
        $unreadItems[1].Display()
    }
    else {
        $explorer = $outlook.ActiveExplorer()
        if ($explorer) {
            # if the Outlook window is already opened, show that window and change the folder
            $explorer.Activate()
            $explorer.CurrentFolder = $folder
        }
        else {
            # Outlook window is not yet opened so show a new Explorer
            $folder.Display()
        }
    }

    # hide this window immediately
    $window.WindowState = [System.Windows.WindowState]::Minimized
})
Finally, we got this!

What feels intuitive as a click response might be different depending on the person but you can easily customize it using Outlook objects.
Conclusion
In this article, I showed my process where I found an issue, came up with an idea and made a small app that meets my needs. I added some customizability to the app and made it public so check out the repository here if you are interested. Hope this article sparks someone's interest.


